Snowflake Clustering refers to a performance optimization feature in the Snowflake cloud-based data warehousing platform. Snowflake clustering improves query processing efficiency by organizing data on disk in a structured and optimized manner.
In Snowflake, data is stored in virtual warehouses, which are scalable compute clusters. Clustering involves physically sorting the data within these virtual warehouses based on one or more columns known as “clustered keys.” Clustering aims to group similar data based on the values in the specified columns.
When data is clustered, rows with similar values in the clustered keys are stored together on disk. This organization reduces the amount of data that needs to be scanned during query execution. Consequently, queries involving filtering, aggregating, or joining the clustered keys perform much faster, as the database engine can access the relevant data more efficiently.
Key Concepts in Snowflake Clustering
Comparison between Snowflake Clustering and Data Partitioning
Choosing the Right Clustered Keys for Optimal Performance
Column Selection: Identify columns frequently used in your dataset’s filtering, aggregating, and joining operations. These columns are candidates for clustered keys.
Cardinality: Consider the cardinality of potential clustered keys (i.e., the number of distinct values). Higher cardinality may lead to more efficient clustering.
Distribution: Choose clustered keys that ensure a balanced data distribution to avoid data skew and optimize resource utilization.
Joining Considerations: When performing joins, align clustered keys with those used in the join conditions to maximize join performance.
Analyze Query Patterns: Analyze historical query patterns to identify commonly used filtering attributes and optimize for them.
Strategies for Effective Data Partitioning
Understand Data Access Patterns: Analyze how your data is queried to determine suitable partitioning criteria. Commonly accessed attributes, such as date or region, can be good partitioning keys.
Data Size Consideration: Partition your data in a way that keeps individual partitions within manageable sizes, avoiding excessive scanning and resource consumption.
Range vs. Hash Partitioning: Choose between range partitioning (based on numeric or date ranges) or hash partitioning (based on a hash function), depending on the nature of your data and query patterns.
Periodic Partitioning: For time-series data, consider periodic partitioning (e.g., monthly or quarterly) to facilitate data management and archiving.
Adjust as Data Grows: Reevaluate your partitioning strategy periodically to maintain optimal performance, especially as your data grows.
What are Snowflake Micro-Partitions?
Snowflake saves data automatically by default in continuous chunks called micro-partitions. These micro-partitions, which hold between 50 and 500 MB of uncompressed data, are automatically created whenever data is imported into Snowflake tables. Each micro-partition is organized in a columnar fashion and corresponds to a set of rows.
All rows contained in a micro-partition are tracked by Snowflake’s metadata, which includes:
The micro-partition’s column range values for each column.
How many different values there are.
Additional characteristics are applied for both optimization and effective query processing.
Snowflake micro-partitions (Source: Snowflake)
As seen in the image above, Snowflake’s table content is displayed on the left as the logical structure and on the right as the physical structure, which comprises four micro-partitions. Each partition can store 50 to 500 MB of uncompressed data. The table contains columns for type, name, nation, date, and 24 rows of data, as you can see. Additionally, the second and twenty-third rows are highlighted. The table’s structural layout is shown on the right side. Snowflake divides the table into four distinct micro-partitions, each with six rows of information. Data rows 1 through 6 are included in the first micro-partition, while rows 7 through 12, 13 to 18, and 19 to 24 are included in the other micro-partitions.
The table’s data is kept in columns rather than rows and then divided into several micro-partitions. Therefore, anytime you search for a specific record, the Snowflake locates it in the pertinent partitions, makes just the necessary queries to those partitions, and retrieves it from the micro-partitions.
Benefits of Snowflake Micro-Partitioning:
1. Automatic partitioning practically eliminates the need for human intervention.
2. The modest size of Snowflake Micro-partitions makes DML operations effective.
3. “Zero-copy cloning,” made possible by Snowflake Micro-partition metadata, enables effective replication of databases, tables, and schemas without additional storage expenses.
4. To maintain data integrity when modifying data in a Snowflake zero-copy clone, original micro-partitions remain immutable.
5. Through horizontal and vertical query trimming and scanning just the necessary micro-partitions, Snowflake Micro-partitions enhance query performance.
6. Each micro-partition records the clustering metadata, which enables Snowflake to improve query performance even more.
7. Micro-partitions also individually compress each column. Snowflake automatically gives each micro-partition’s columns the most effective compression strategy.
Implementing Snowflake Clustering
Step-by-Step Guide to Enabling Clustering for a Table
1 – Create or Identify the Table: Start by creating a new table or identifying an existing table in your Snowflake database where you want to implement clustering. Ensure the table contains the data you want to optimize for query performance.
2 – Choose the Clustered Keys: Identify the columns in the table you want to use as clustered keys. These columns should be frequently used in filtering, aggregating, or joining operations in your queries. Generally, high cardinality columns (columns with many distinct values) make good candidates for clustering.
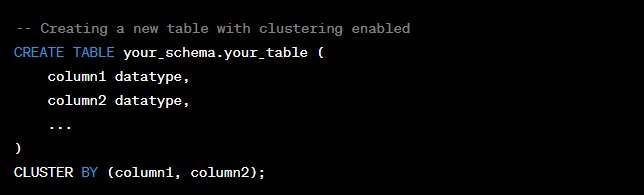
3 – Enable Clustering for the Table: Use the CLUSTER BY clause in your CREATE TABLE or ALTER TABLE statement to enable clustering for the table and specify the clustered keys. For example:
Alternatively, if you want to allow clustering for an existing table, use the ALTER TABLE statement:
4 – Monitor Clustering Status: After enabling clustering, you can monitor the clustering status for the table by querying the INFORMATION_SCHEMA.CLUSTERING_COLUMNS view:
This view provides information about the columns used for clustering and whether automatic clustering is enabled.
5 – Load or Re-cluster Data: For new tables, data will be automatically clustered as it is loaded into the table. However, you may need to trigger a re-clustering operation for existing tables to optimize the data organization. Do this using the ALTER TABLE statement with the RE-CLUSTER option:
Re-clustering will physically organize the data based on the specified clustered keys.
6 – Analyze Query Performance: After enabling clustering and potentially re-clustering the data, analyze the query performance to observe the improvements. Monitor query execution times and resource usage to ensure that clustering effectively optimizes your queries.
Monitoring Query Performance with Clustering
Query Execution Times: Keep track of query execution times before and after enabling clustering. Monitor the response times for queries that involve clustered keys. If clustering is working effectively, you should observe improvements in query performance, such as reduced execution times.
Resource Usage: Analyze the resource consumption for queries using the Snowflake Web Interface or the Snowflake Query History. Compare the resource usage for queries that leverage clustering with those that do not. Clustering should result in optimized resource utilization.
Query Plan Analysis: Examine the query execution plans for queries involving clustering. Check whether the query optimizer effectively leverages the clustered keys to minimize data scanning. A well-implemented clustering strategy should result in query plans that utilize efficient data access paths.
Data Skew and Distribution: Keep an eye on data distribution and skewness in the clustered keys. Significant data skew may indicate that the chosen clustered keys are not well-balanced, which could affect query performance. If the skew is observed, consider adjusting the clustering strategy.
Automatic Clustering Information: Use the INFORMATION_SCHEMA.CLUSTERING_COLUMNS view to monitor the status of automatic clustering for the tables. Ensure automatic clustering is enabled and functioning as expected to maintain data optimization over time.
Query Patterns: Analyze the most frequent and resource-intensive query patterns. Check if they align with the chosen clustered keys. Adjust clustering strategies based on observed query patterns to optimize the data organization for common use cases.
Regular Performance Reviews: Schedule regular performance reviews to assess the impact of clustering on the overall data warehousing environment. Continuously evaluate the effectiveness of clustering and make adjustments if necessary to maintain optimal performance.
Venkata S is a Solution Architect working on Cloud projects. He has profound skills on Azure and Snowflake and has a 12+ years of experience in leading the projects.